Contents
Self-Serve Tools
Self-Serve tools include tools and features of ICI that can be used out-of-the-box by authorized users. Besides serving ICI users with specific feature and performance goals, being self-sufficient is the primary goal of these tools. These tools are user-friendly and time-saving, enabling users to perform tasks by themselves instead of reaching out to Icertis Solutions Engineering, Database or Support teams based on the requirement. Sometimes, these changes were minor and of low complexity, but the turnaround time was substantial.
The ICI Self-Serve tools include:
- Search Sync Tool
- Translations Editor Tool
- Configurations Key Editor Tool
- Promote to Production (P2P) Tool
- Import Solution Tool
- The ICI application, version 7.11 and above
- The user must have valid credentials to access ICI and the User Administration tile.
Search Sync Tool
The Search Sync tool gets data from Icertis Search for a given instance’s Sys Id and synchronizes it if required. Using the fetched ES value, the tool validates if the Sys Id is the latest for the respective instance or if sync is required. This tool can be accessed by the Administrator from the Admin Task on the "Admin" tile.
If the key exists, the latest value from ES will be displayed. If the key does not exist, the system displays an error message indicating that the value could not be fetched for the provided Sys Id. The Sys Id can be provided as an input CSV file or as a comma-separated. Either comma-separated Sys Ids can be entered or a CSV file can be uploaded.
This helps to make the entity search more streamlined and efficient. Users can quickly refer to related agreements at the time of deals or audits.
Note: Data can be fetched from only one instance at a time. A dedicated key must exist for ES sync to work with Sys ID.
Refer to Search Sync Tool on the Admin Task page for more details.
Users can now get data from Icertis search for a given instance’s SysId so that they can look up the value and identify whether it is the latest or if a sync is needed. If the key exists, the latest value from ES will be displayed. If the key does not exist, the system will display the error message “Could not fetch value for provided SysId”.
Translations Editor Tool
The ICI platform is available in different languages and different languages label text are available for localization. However, to make any changes to the localization values, users had to reach out to the Solutions Engineering or Database teams. Sometimes, these changes were minor and of low complexity, but the turnaround time was substantial.
Hence, a self-service Translations Editor tool has been introduced that contains all strings that are localized. The Translations Editor tool supports adding localized values in different languages for Reason Codes as well.
Users can now download all keys and their localization values as an Excel file, modify multiple values, and upload the modified changes to ICI. Once the values are updated in ICI, the caches are updated automatically to avoid the cache flush and server restart. This has significantly enhanced productivity as the turnaround time to update the Resource Key values has been eradicated.
Using this tool, users can now:
- Search for a specific string using the search bar and update the Resource Key value for Language and Locale.
- Update multiple language strings by selecting and saving the Resource Key value.
- Download and upload the localization key values using Microsoft Excel.
- View the modified values in the ICI instance immediately.
To use the Translations Editor Tool:
Refer to Translation Editor in Admin Task page for more details
Configuration Key Editor Tool
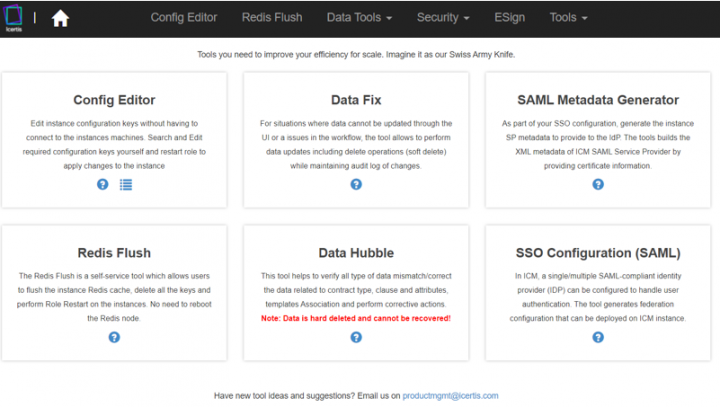
The Configuration Key Editor tool facilitates a logged-in user (who has access to Azure subscription) to search and update configuration keys, as and when required. It has been introduced for easier instance management and improved productivity, thus reducing the dependency on the Engineering and DevOps teams.
It includes:
- The Config Editor
- The Redis Flush
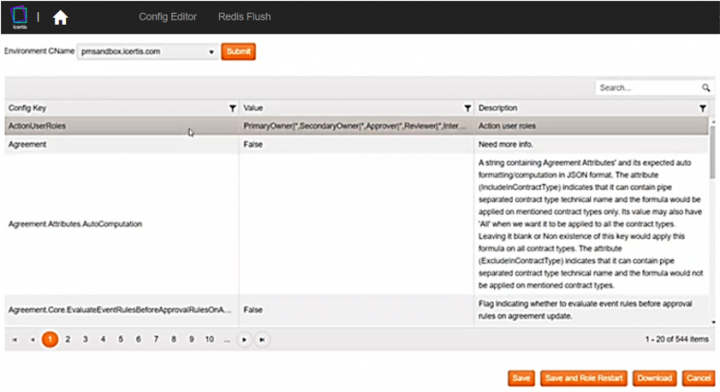
The "Config Editor" is a self-service tool that allows teams to edit instance configurations without having to connect to the instance machines. Once the key values are changed, the cache is automatically updated to avoid the server restart. The tool only works for non-production environments. The production environment configuration changes are controlled by the Operations team, and the tool would not be available for the production environment.
The "Redis Flush" is a self-service tool that allows Administrators to flush the cache or look up a particular key for its value of Delete a Key. The tool can also be used to perform "Role Restart" on the instances to which the user has access.
1. Login to the ICI Tools portal (icmtools.icertis.com) with your ICI credentials.
4. Click "Submit" after selecting the environment. The configuration JSON files for the selected environment are displayed for all available features, security details, database connections, and so on related to the selected instance.
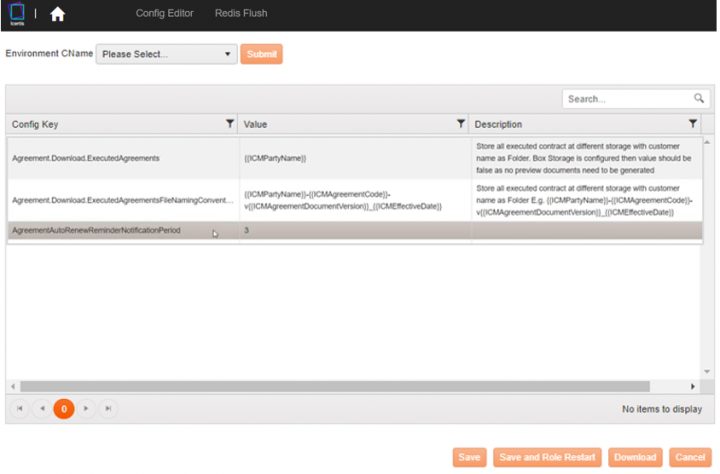
5. Select a Config Key from the list to change its value as required. For example, the Config Key AgreementAutoRenewReminderNotificationPeriod has the reminder period set at 3 days may be changed to 2 days.
6. Click "Save and Role Restart" to save the new value of 2 days. The specific JSON file for the respective CName will be reset (i.e. perform a role restart). This means that the configuration is reset in the Icertis search and the server is restarted so that the new value is reflected on the instance.
7. Click "Download" to download the entire file so that you can edit it offline and then upload it directly to the instance.
Promote Configurations (P2P) Tool
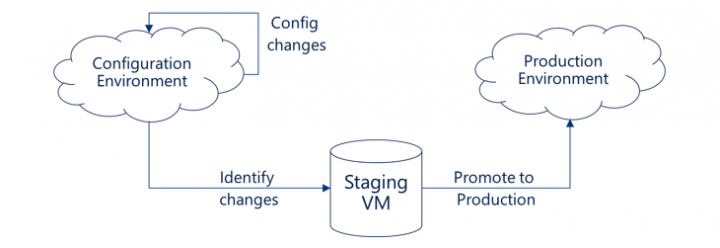
The Promote to Production (P2P) process of the ICI platform helps to move ICI Configuration from source (Config/UAT) environment to target environment, thus reducing the manual efforts to do so. P2P process enables to selectively move ICI configuration. The Promote Configuration Tool or P2P is designed to accomplish just that.
The tool already supported contract types, contract type attributes, clauses and templates (along with the documents), notification templates, rules, masterdata, users, user groups and security groups. The Icertis search sync is also supported by the tool.
With the 7.15 release, to provide a seamless P2P experience, enhancements have been made in ICI to support the following additional entities :
- Organizations (Orgs), Organization Groups (Org Groups)
- Users, User Groups, Security Groups
- Role Action Mapping
- Currencies
- Reasons
- SLA Matrix
- Notification Category
- Default Search Columns
- Application Settings
- Global/Admin Saved Searches
Here is an overview of the P2P process:
Accessing P2P Tool
To access the P2P tool:
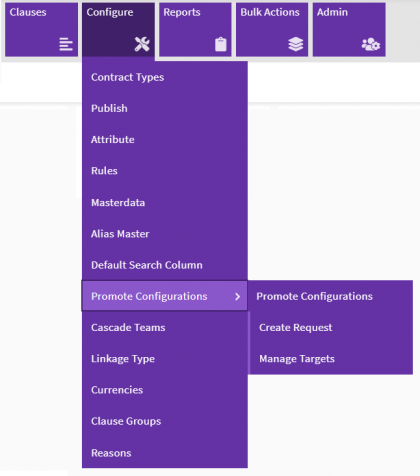
Click "Configure" >"P2P Configuration" tile or menu on the top navigation. The "Promote Configuration" page opens.
The Promote Configurationsdisplays the current status of P2P requests and their status.
Note: Users cannot edit a request that is in the Completed state.
Creating a P2P Request
To create a P2P Request:
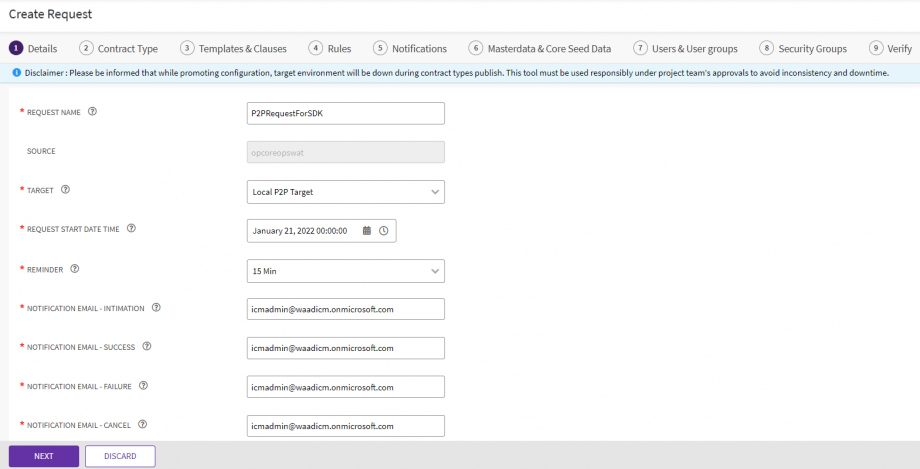
1. Click "Configure" > "Promote Configurations"> "Create Request". The "Create Request" page opens.
2. Enter a "Request Name".
3. Select a "Target" from the drop-down.
4. Select the "P2P Request Start Date Time".
5. Select the time to trigger an email to the recipient from the "Intimation Email minutes before P2P Starts" drop-down list. For example, 15 Min.
6. Enter the intimation recipient Email Id in the "Notification Email – Intimation" field.
7. Enter the notification recipient Email Id in the "Notification Email – Success" field.
8. Enter the notification recipient email Id in the "Notification Email– Failure" field.
9. Enter the notification recipient email Id in the "Notification Email – Cancel" field.
10. Click "Next". The "Contract Type" tab opens.
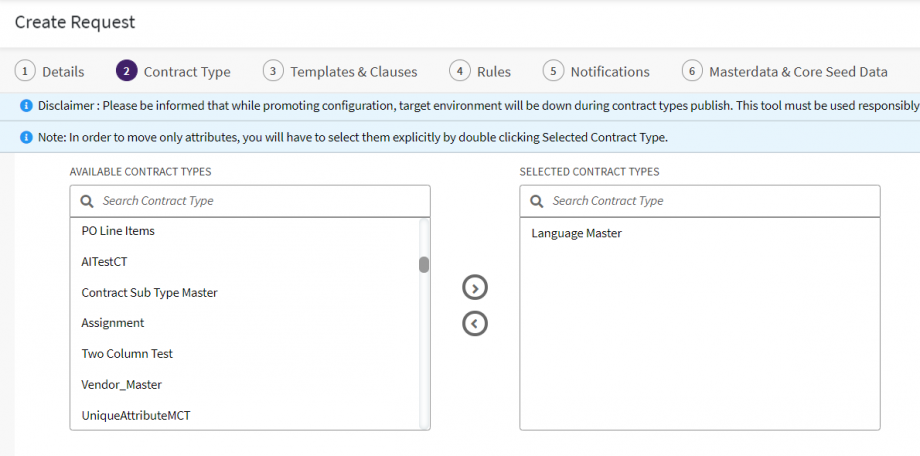
11. Select the "Contract Type" from the "Available Contract Types".
12. Click the right arrow to move the selected contract type to the "Selected Contract Types".
14. Select a template from the "Available Templates" columns.
15. Click the arrow key to move the selected template to the "Selected Templates" column.
17. Click the arrow key to move the selected clause to the "Selected Clauses" column.
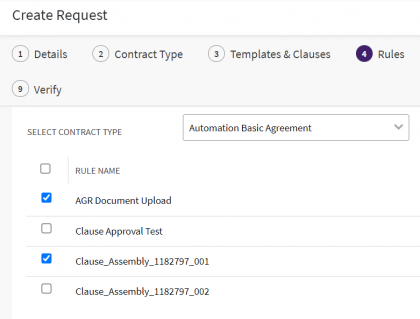
20. Select the Rules that appear.
21. Click "Next". The "Notifications" tab opens.
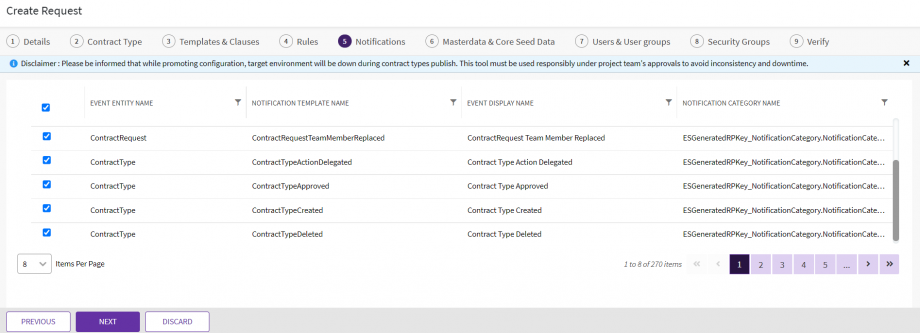
22. Select the notifications from the grid.
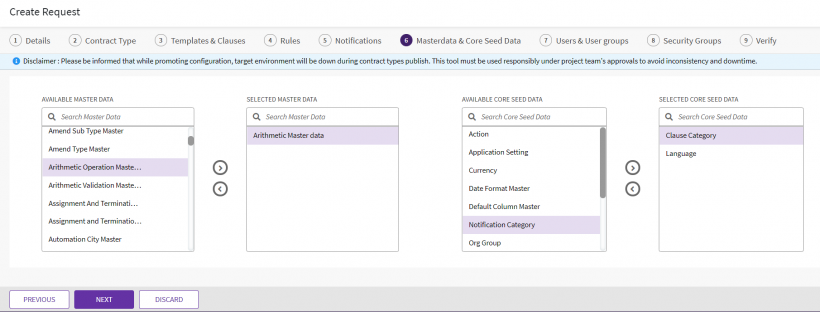
24. Click "Next". The "Master Data & Core Seed Data" tab opens.
25. Click the arrow key to move the selected rule to the "Selected Master Data" column.
26. Select the seed data from the "Available Core Seed Data column".
27. Click the arrow key to move the selected master data to the "Selected Core Seed Data" column.
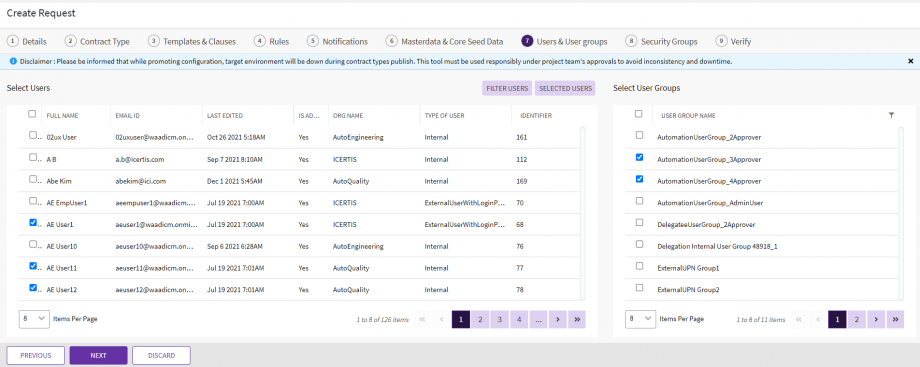
31. Select the users on the "Select Users" pane.
32. Click "Selected Users" from the top right of the pane to view the list of users that have been selected.
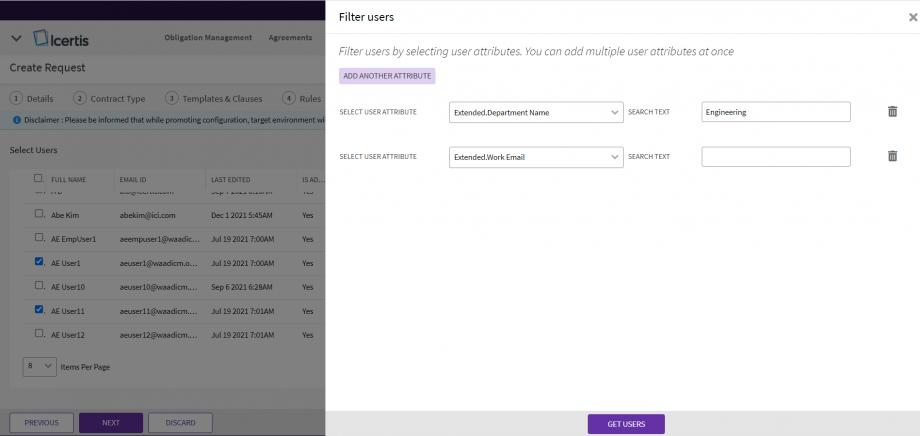
33. Click "Filter Users" to view the list of users by an attribute or click "Add Another Attribute" to filter users by additional attributes. For example, Email ID, Phone Number.
35. Click "Next" if any or no user or user group is selected. The "Security Groups" tab opens.
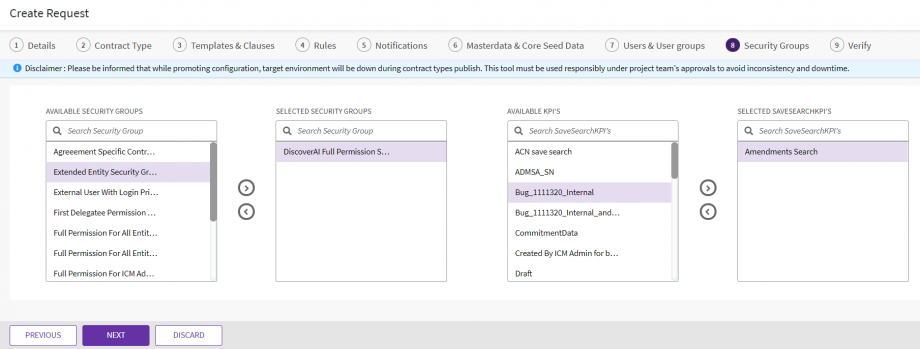
36. Select the security group from the "Available Security Groups" columns.
37. Click the arrow key to move the selected security group to the "Selected Security Groups" column.
38. Select the KPI from the "Available KPI’s" columns.
39. Click the arrow key to move the selected KPI to the "Selected SaveSearchKPIs" column.
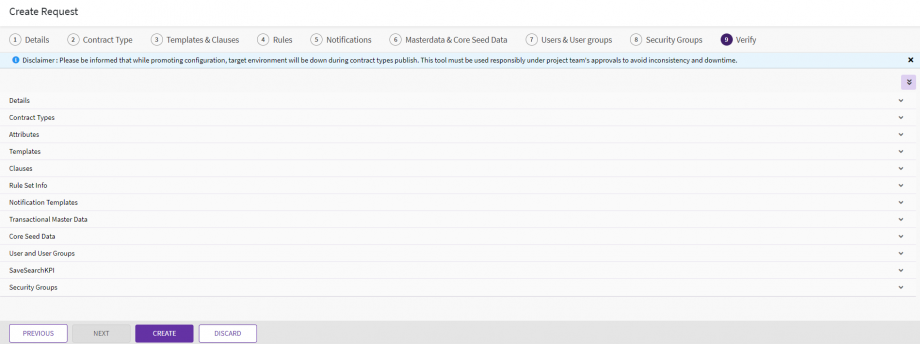
41. Verify details of the contract types, attributes, templates, clauses, ruleset information, notification templates, transactional master data, core seed data, user and user groups, save search KPI, and security groups that you have selected. You can expand all categories by Expand/Collapse ALL icon at the top right or can expand the individual category or tab information with arrows provided in the far right of each category.
42. Click "Create". The confirmation window opens indicating that downtime is required for this request.
43. Click "Yes" if you wish to proceed. The success message opens indicating that the P2P request created successfully.
The P2P request status changes to "ADDED".
On completion of the P2P request, the status changes to "Completed".
To view error details:
2. Click the three dots in the "View" column on the far right.
- Request Error Details: This tab contains multiple columns providing more information about the P2P Request.
- Warning: Displays if an error or warning is encountered when creating the P2P request.
- Validation Area: Displays the specific area where the validation error occurred.
- Error Message: Displays the error message for the P2P request including entity name and SysId.
- Error Description: Displays the detailed description of the error that has occurred when creating the P2P request.
- Environments: Displays the environments where P2P request creation is not working as expected. For example, Source, Target.
- Auto-Fix: Indicates if the error encountered when creating the P2P request can be fixed automatically.
- Manual Step Actions: Displays the list of actions that users need to perform manually to fix the errors when creating the P2P Request.
- Manual Work Pending: Displays the actions that must be taken manually after P2P request is completed.
- Action: Displays the list of actions users must perform to fix the errors encountered when the P2P request is completed. For example, “Publish Required”, “Cache flush required” and so on.
- The following details are displayed for an action where applicable. For example, if the action “Es Sync required” action is displayed, then the corresponding details are displayed in the three columns:
- Entity Name
- Entity Value
- SysId
Users can apply the fix automatically by clicking “Apply Fix”. This removes all the existing validation errors and ensures that the errors which are marked as auto fix get fixed automatically.
This button appears only if at least one of the errors can be auto fixed, that is, at least one error displays the value “Yes” in the Auto Fix column.
If there are any errors encountered when creating the P2P Request, users can resume the P2P Request creation from the step where it failed by clicking “Resume” which will appear at that time.
Import Solution Tool
ICI features an out-of-the-box solution for configuring ICI entities from the outset - the Import Solution tool. While saving valuable time and complexities associated with the initial configuration process, this tool provides a self-service, automated utility, and alleviates human intervention or any manual processing.
Using the Import Solution tool, ICI users can:
- Import configurations –
- From a source ICI instance to a target ICI Instance.
- Between multiple versions of ICI.
- These entities can be imported with this tool:
- Contract Types
- Templates
- Clauses
- Rules
- Notifications
- Masterdata Instances
- Seeded Masterdata entity instances
- Users & User Groups
Prerequisites for Import Solution to be implemented
Source instance setup
1. Register and publish preconfigured import solutions, therefore availing source instances for utilization.
2. Set up records for below seeded Masterdata contract types:
3. This configuration key can be used for the Source to communicate with the Import Solution engine – “Core.Tools.P2P.P2PDBConnectionString”. The value for this key should be the DB connection string of the Import Solution engine.
Target instance setup
- This configuration key can be used for the Target to communicate with the Import Solution engine – “Core.Tools.ImportSolution.Configuration”. The value for this key should be the DB connection string of the Import Solution engine.
- “Manage” permissions will be required in the Security Groups for – “Admin Task” and “Promote Configuration”.
Source and Target mapping
The Source and Target instances need to be mapped in the Import Solution engine database. To do this, please reach out to the database team.
Using the Import Solution tool
To access the Import Solution tool and create an import configuration request:
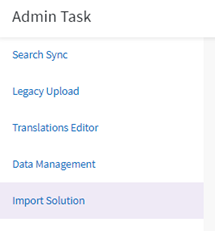
1. Click the “Admin” tile > “Admin Task”.
2. Click “Import Solution”. The “Import Solution” page opens.
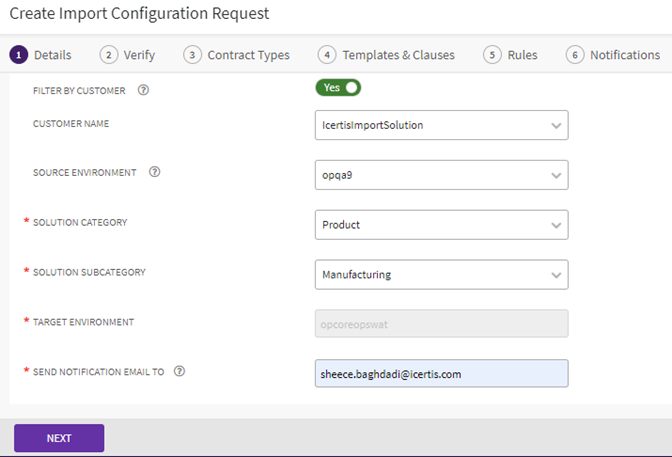
3. Click “Create” on the Import Solution tool page. The “Create Import Configuration Request” page opens.
4. Fill all required fields and click “Next”.
5. Select and fill all necessary information across all the relevant tabs.
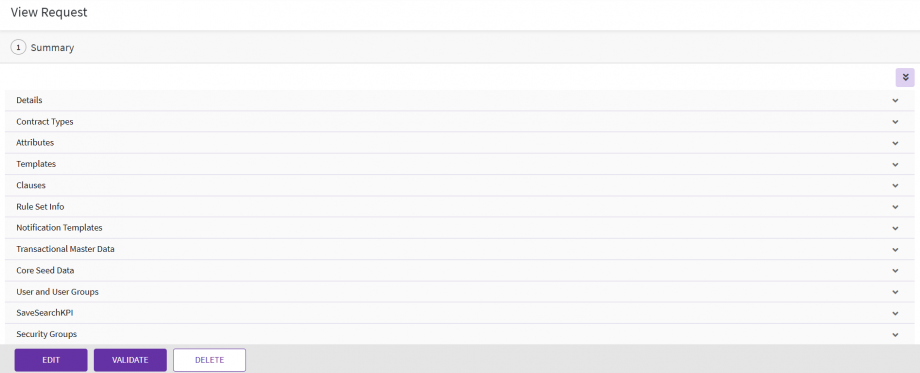
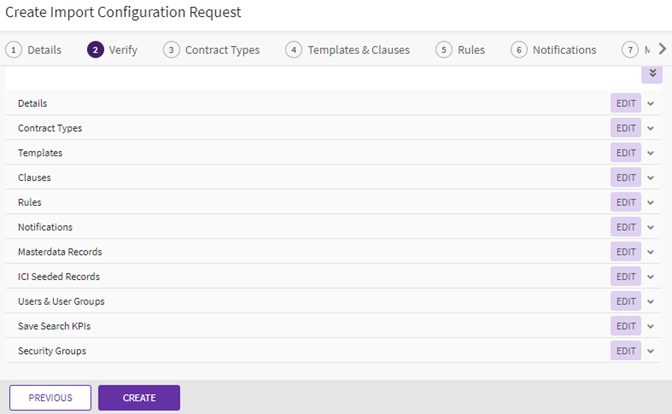
6. Verify all information within the “Verify” tab.
7. Click “Create”. The request to import the specified configuration will be created, and a confirmation message is displayed on the “Import Solution Request Progress” drawer.
Related Topics: Agreement Management | Association Management | Compliance Management | Template Management | Clause Management | Configuration | Reports | Localizing ICI |
