Contents
- 1 ICI Risk Management App
- 1.1 Overview
- 1.2 The Terminology
- 1.3 The Challenge
- 1.4 The Solution
- 1.5 The Capabilities
- 1.6 The Benefits
- 1.7 The Prerequisites
- 1.8 Configuration setup overview
- 1.9 Prerequisite set-up
- 1.10 Working with Risk Assessment
- 1.11 Creating a Risk Assessment
- 1.11.1 Searching and viewing the Risk Assessment
- 1.11.2 Editing the Risk Assessment
- 1.11.3 Canceling the Risk Assessment
- 1.11.4 Deleting the Risk Assessment
- 1.11.5 Submitting the Risk Assessment
- 1.11.6 Rejecting the risk assessment
- 1.11.7 Approving the risk assessment
- 1.11.8 Auditing Risk Assessment
- 1.12 Working with Risk Area
- 1.12.1 Creating Risk Area automatically using rules
- 1.12.2 Creating Risk Area manually
- 1.12.3 Searching Risk Area records
- 1.12.4 Risk Area using Global Search
- 1.12.5 Working of existing ICI actions for Risk Area
- 1.12.6 Taking actions on the Risk Area
- 1.12.6.1 Editing Risk Area from Three Dots Menu
- 1.12.6.2 Editing Risk Area from Risk Area Details page
- 1.12.6.3 Initiating Due Diligence
- 1.12.6.4 Remediating the risk area
- 1.12.6.5 Monitoring the risk area
- 1.12.6.6 Iterating workflow for risk area
- 1.12.6.7 Deactivating the risk area
- 1.12.6.8 Auditing Risk Area
- 1.12.6.9 Moving Risk Area workflow automatically
- 1.13 Creating and managing tasks for Risk workflow
- 1.14 Accessing the Risk Area actions Notifications
ICI Risk Management App
Overview
The Icertis Contract Intelligence (ICI) platform introduces the Risk Management Application to make it easier for professionals to carry out their tasks related to risk management such as assessment, due diligence, remediation, monitoring and reassessment. Risk management is the process of identifying potential risk, assessing the magnitude of risk based on the business objectives, devising strategies to eliminate them and tracking the performance until they are completely mitigated.
The platform’s modern, scalable and integration-friendly cloud architecture can model even the most complex risk management scenarios. The App provides secure access such that only authorized users can access the App entities and data, using ICI’s access control functionalities. The user-friendly interface makes it possible for anyone in the enterprise having access to be able to use the platform with ease.
Icertis uses a standard framework of discovery, assessment, remediation, monitoring and optimization to manage enterprise risk.
- Business Operations Risk: For example, the impact of pandemic on the business operations of an organization.
- Contractual Risk: For example, managing risks that arise from non-standard agreement terms, clauses, and so on.
- Counter-Party Risk: For example, managing risks relevant to suppliers and vendors.
The Terminology
Here are some terms that will help you better understand the risk management process:
- Risk Assessment: It deals with the process of identifying and evaluating the magnitude of potential risk areas.
- Risk Area: It is the exposure that an organization has from internal or external factor(s) that impact the normal
functioning of business and will lower its bottom line (or profits) or lead it to fail. For example, cyber security
risk.- Risk Taxonomy: It is comprehensive set of risk categories and sub-categories used in an
organization. It outlines as approach to categorize and aggregate all types of risks that could affect
the organization's objectives. - Assessment: Risk owner determines or assesses whether identified risk area is valid or not.
Likewise, risk owner can add a risk area manually. - Due Diligence: It is a complete review of the risk area. As part of incomplete or missing
information, tasks may be created to gather information. - Remediation: It is a strategy created to mitigate risks. For example, Avoid strategy, Transfer
Strategy, Reduce Strategy, etc. Based on the remediation strategy, mitigation tasks are initiated.- Control Effectiveness Rating: It represents the effectiveness of risk remediation actions
taken to mitigate risk.
- Control Effectiveness Rating: It represents the effectiveness of risk remediation actions
- Risk Taxonomy: It is comprehensive set of risk categories and sub-categories used in an
- Monitor and Optimize: Monitoring involves the process of tracking the progress of residual risk level and risk
score of a risk area as against the remediation tasks made for mitigation. If the residual risk score and risk
level does not change as compared to the inherent score, then optimization allows taking additional due
diligence or remediation tasks to mitigate risk. - Risk Score Matrix: It is a matrix that uses a combination of likelihood and consequence rating to determine
magnitude of risk.- Inherent Risk: It is a risk indicator. It is the starting score for each identified risk area and is
expected to be controlled. - Residual Risk: It is a risk indicator. It is the score that depicts the risk remaining once mitigation
actions have been planned and implemented. - Likelihood Rating: On a risk matrix, it represents the likelihood (level of probability) of risk
occurrence. - Consequence Rating: On a risk matrix, it represents the magnitude (level of impact) of risk
occurrence. - Risk Level: It is the qualitative score for every risk area transaction.
- Risk Score: It is the quantitative score for every risk area transaction.
- Inherent Risk: It is a risk indicator. It is the starting score for each identified risk area and is
The Challenge
Business risk can emerge from any division of a company and must be managed proactively to avoid devastating
impacts. Often, these risks originate in the contracts of an organization with an external party or because of the
business and regulatory environment in which the entity operates.
Yet, most organizations manage contractual, regulatory, financial reporting and environmental obligations
manually. Automated extraction and monitoring of obligations are prevalent in very few companies across various
industry verticals. Consequently, organizations do not have adequate visibility into the status of these obligations
and end up being reactive in identifying and handling risks.
This raises the following challenges:
- Companies cannot proactively assess and manage their risks in business environment characterized by
unpredictability, volatility and mounting counter-party solvency risks. - Traditional Governance, Risk and Compliance (GRC) and Risk Management tools are not able to roll-up
enterprise-wide risk insights from across contracts which are the ultimate source of commercial truth, and
hence are only good at reporting and analyzing risks in hindsight. - Lack of visibility and insight into obligations, typically spelled out in detail in service contracts, can lead to
substantial risks for businesses if not surfaced at the appropriate time and monitored at an adequate level to
provide required executive attention.
The Solution
Built on the Icertis Contract Intelligence platform, the ICI Risk Management App brings a paradigm shift in
the management of business risks. The App offers a process-oriented enterprise-wide solution to stay on top
of all potential risks that a business faces – whether they emanate from the potential insolvency of a
counter-party, payment default by a customer, supply disruption due to a pandemic or natural disaster,
logistics blockades due to localized conflicts, or other market turbulence.
With the Risk Management App, companies can:
- Perform risk discovery, assessment, remediation, monitoring and optimization in any business context that is
relevant to a specific organization. For example, supplier risk assessment at the time of onboarding a supplier,
customer credit risk check while signing long-term contracts on non-cash terms, contractual performance risk
while evaluating technical capabilities of a service provider, etc. - Prevent and reduce risk-injection as opposed to only managing risks.
The Capabilities
The intelligent and easy-to-use ICI Risk Management App offers these powerful capabilities:
- Ability to embed risk assessment in various business processes:
- For example, during negotiation, supplier/ customer onboarding, third party contract ingestion, etc.
- Flexible and configurable risk assessment frameworks:
- To cater to various industry and business-specific risk management requirements.
- Questionnaire-based risk identification:
- Questionnaire configuration capability to discover all vendor or business operation risks based on
responses.
- Questionnaire configuration capability to discover all vendor or business operation risks based on
- Risk area and scoring model configurability:
- A configurable risk area to gauge contract, counter-party and operations risk at various levels of
business granularity. - An easy-to-configure platform that helps to set up a quantitative and qualitative risk score model to
meet business needs.
- A configurable risk area to gauge contract, counter-party and operations risk at various levels of
- Alerts and notifications:
- In-built notifications to inform risk owner about changes in risk area status.
- Auditing:
- Audit trails of every action with user and time-stamp details.
The Benefits
- The ICI Risk Management App changes the risk management paradigm from identification and mitigation to
preventing risk injection and remediation. - Effective risk monitoring reduces the impact of operational, financial and reputational risk, contributing
significantly to the company’s bottom line. - Configurable system can conform to any risk model in the world and even develop industry and companyspecific risk models with no custom code required, thereby greatly reducing deployment costs.
The Prerequisites
The user must have:
- Completed ICI Product Training
- Risk Management App must be enabled on customer environment
Configuration setup overview
ICI offers the ability to determine the application type (Contracting, Sourcing, Obligation Management and Risk Management application) when creating a contract type. This is possible with the inclusion of two new choice type attributes, Business Application Type and Business Application Category at the contract type level. This feature helps effortlessly drive business applications on ICI platform.
These attributes are enabled through technical configuration and applicable for agreements and associated document contract types. The access privileges for business applications (such as Risk Management) are managed through security groups.
Seeded Configuration and setup
The ICI Risk Management application provides some seeded entities, attributes, workflows, rules and notifications that are necessary for the flow of the risk management. Some of the entities are:
- Masterdata:
- Risk Taxonomy
- Risk Remediation
- Risk Area Master
- Likelihood Rating
- Risk Score Matrix
- Contract types:
- Risk Assessment: as agreement contract type with Business Application Type as Risk Management and Business Application Category as Risk Assessment defined at contract type level.Risk Area as associated document contract type with business application type as risk management and business application category as risk area defined at contract type level.
- Risk Area: as associated document contract type with Business Application Type as Risk Management and Business Application Category as Risk Area defined at contract type level.
- Rules:
- Instantiate the risk areas after completing the risk assessment
- Copy attribute values from risk assessment to the risk area
- Add Team members to the risk area
- Notifications for events:
- Risk area is created
- Risk area due diligence is initiated
- Risk area remediation is initiated
- Risk area monitoring is initiated
- Risk area is deactivated
Refer the Risk Management Configuration guide for details.
Prerequisite set-up
The ICI Risk Management application provides some seeded masterdata that are necessary for the flow of the risk management. Users can create masterdata instances with desired values.
To create masterdata instance:
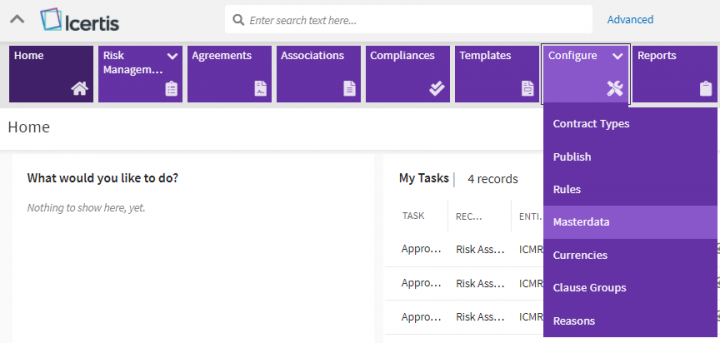
1. Click "Configure" > "Masterdata" from the "Home" page menu. The Masterdata page opens.
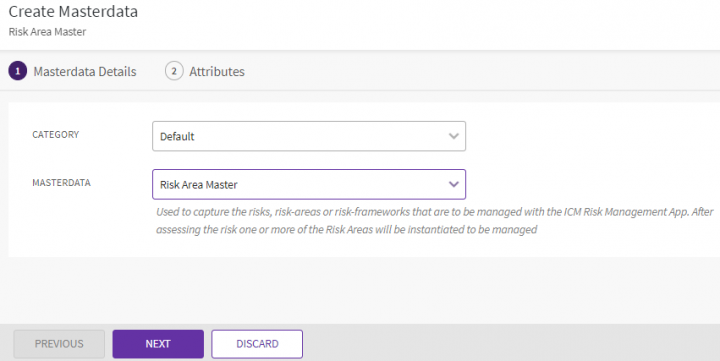
2. Click "Create" button. The "Create Masterdata" page opens.
3.Select the "Masterdata" Contract Type. For example, "Risk Area Master".
3. Click "Next". The "Attributes" page opens.
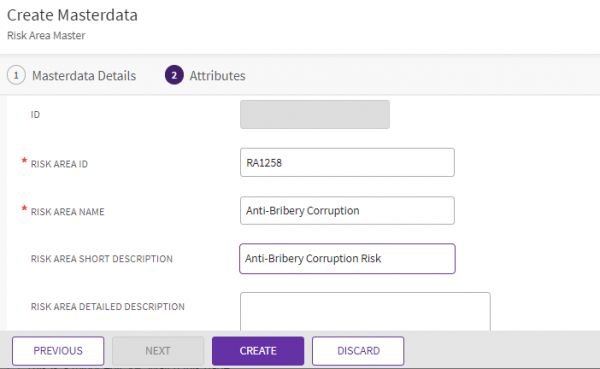
4. Enter or select the details in all relevant fields. For example, enter "Risk Area Name" as "Anti-Bribery Corruption".
5. Click "Create". The masterdata instance is created.
Similarly, setup masterdata for "Risk Taxonomy", "Risk Remediation", "Likelihood Rating" and "Risk Score Matrix" Masters.
Working with Risk Assessment
The ICI Risk Management application enables users to manage risks by creating risk assessment. Risk Assessment deals with the process of identifying and evaluating the magnitude of potential risk areas. For example, buyers can use the ICI Risk Management application that allows configuring a questionnaire to perform supplier risk assessment. The risk areas can be identified based on the responses received for the questionnaire as the outcome of the risk assessment process.
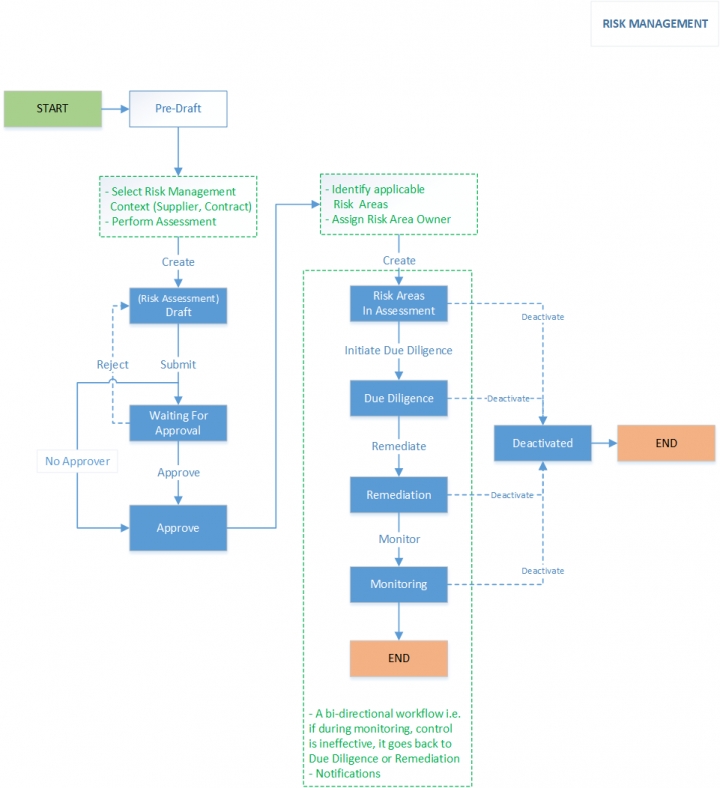
Risk assessment workflow performed by risk assessment owners typically involves the following:
- Initiating Risk Assessment: The risk assessment owners can initiate the risk assessment workflow to identify the risks. For example, the risk assessment can be a questionnaire where the users respond to the questions by submitting it. This initiates the risk assessment in "Draft" state.
- Approving Risk Assessment: Based on the complexity of risk assessment, ICI administrators can configure the rules to add approvers to the assessment team. If there are approvers added to the team, the risk assessment is sent to the approvers for approval. The risk assessment is approved automatically if no approvers are added to the team.
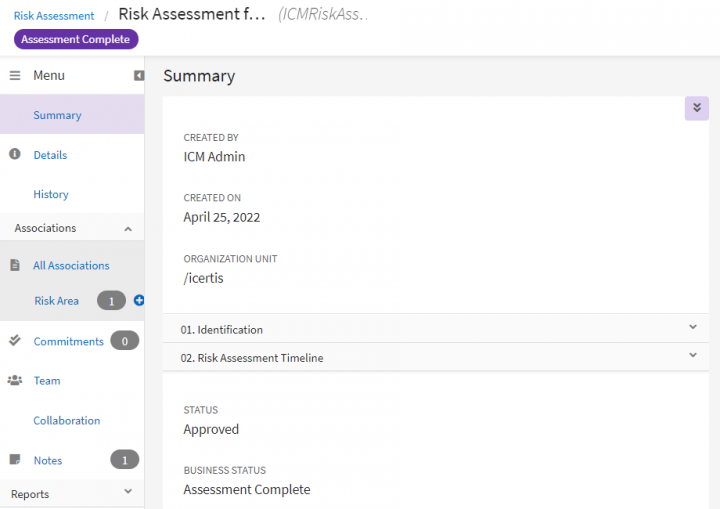
- Completing Risk Assessment: The status of the risk assessment changes to "Assessment Complete" when the risk assessment is approved. The risk area can be identified and auto-instantiated based on the configured rules.
Here is the Risk Assessment workflow at a glance:
Creating a Risk Assessment
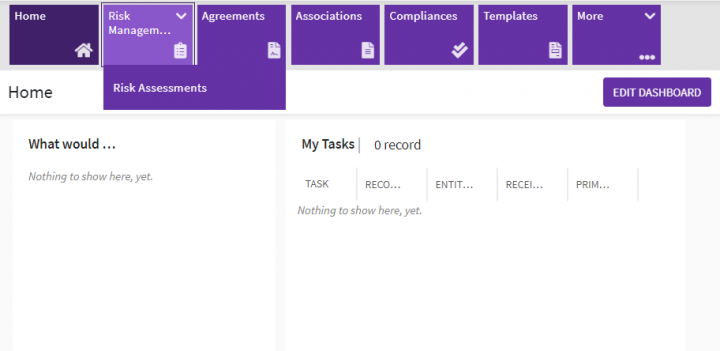
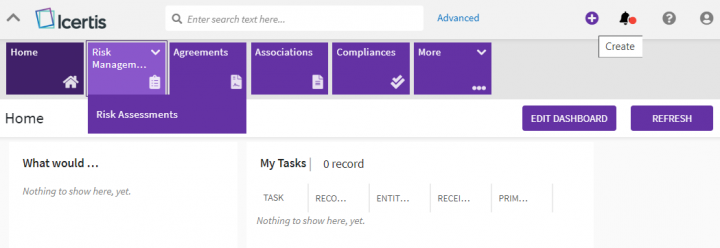
1.Click the "Risk Management" tile on the "Home" page. The dropdown opens with the following option:
- Risk Assessments
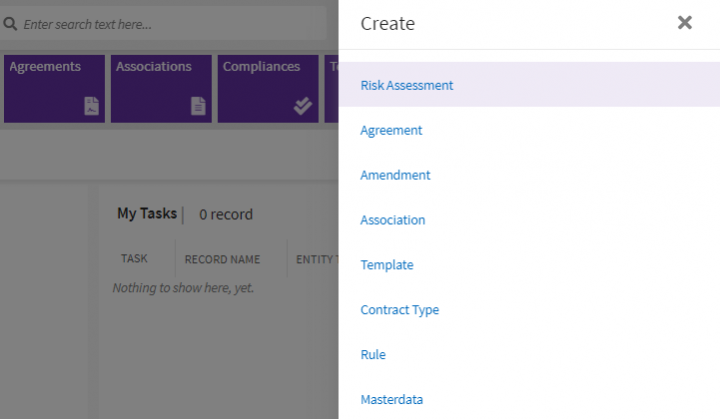
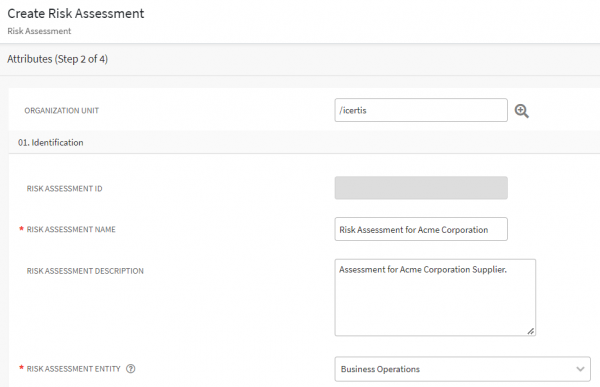
2. Click "Create Risk Assessment". The "Attributes" page for "Create Risk Assessment" opens. The "Attributes" page includes questions to capture the responses based on which the risk areas can be generated. These questions are non-seeded attributes and users can configure them to the Risk Assessment contract type as per their business needs.
Attributes page has seeded sections as:
- Identification
- Risk Assessment Timeline
3. Enter the details in fields in the "Identification" section:
- Risk Assessment Name
- Risk Assessment Description
- Risk Assessment Entity: The context for which the risk assessment is being created. For example, "Business Operations", "Contractual" or "Counter Party".
4. Enter the details in fields in the "Risk Assessment Timeline" section.
- Assessment Start Date: The date that you start the risk assessment of entity. For example, January 15, 2022.
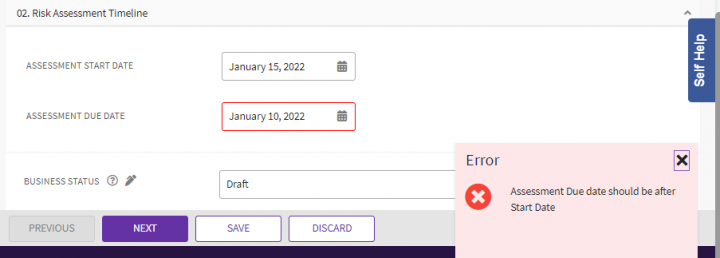
- Assessment Due Date: The date by which risk assessment of entity should be completed. The assessment due date should be greater than the start date, otherwise a validation error message is displayed.
5. Enter the details in fields in all the sections on the Attributes page.
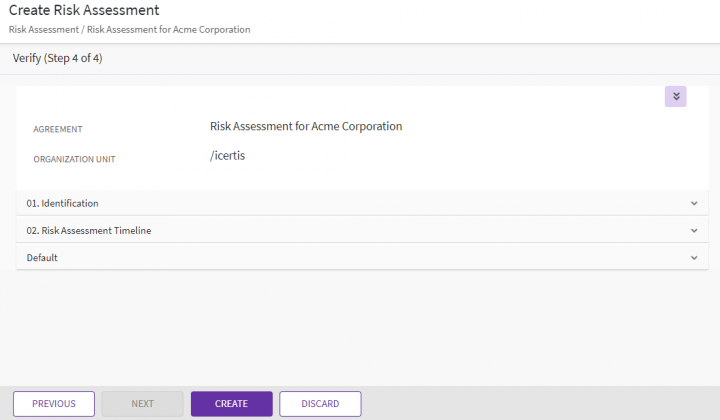
6. Click "Next". The "Verify" page opens.
7. Verify the details and click "Create".
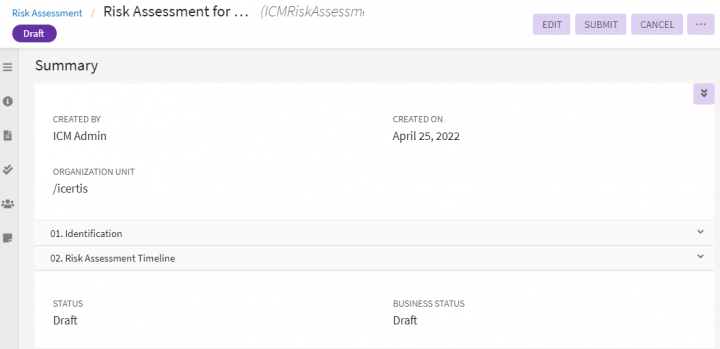
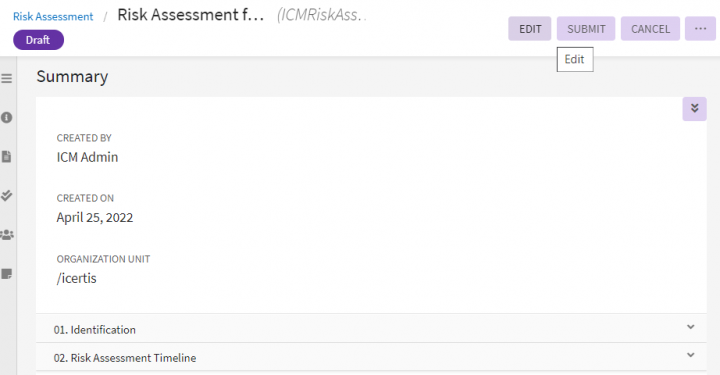
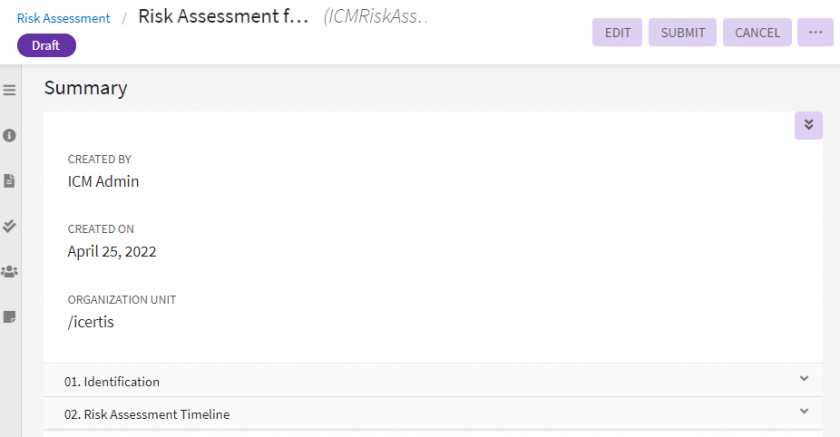
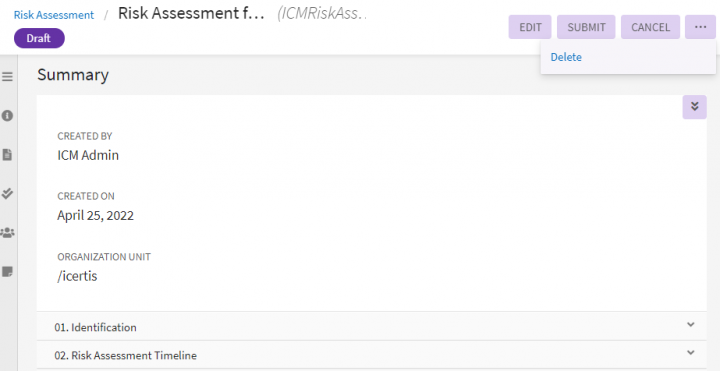
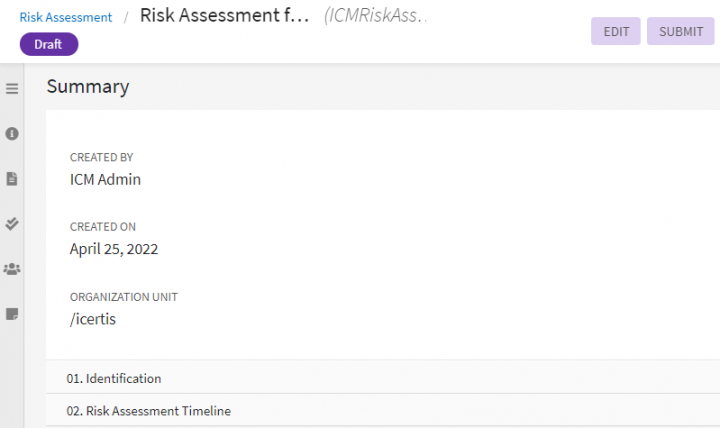
Once created, users can "Edit", "Delete", "Cancel" or "Submit" the "Risk Assessment".
On deleting the risk assessment, users will be redirected to the Risk Assessment “Index” page.
Some actions that are used less frequently such as “Delete”, option is now moved under the three dots icon on the Risk Assessment “Details” page.
The “Copy Record” action is not supported for Risk Assessment.
Searching and viewing the Risk Assessment
1. Click the "Risk Management" > "Risk Assessments" tile options on the "Home" page.
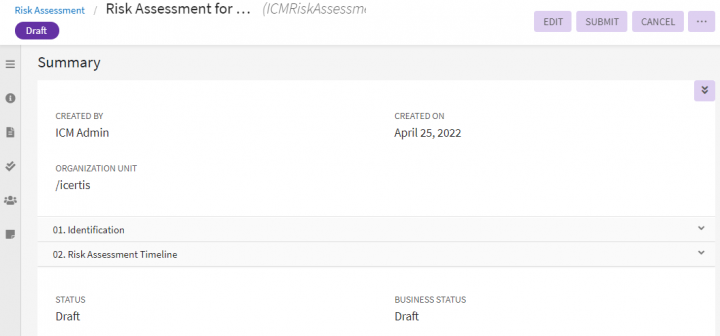
2. Click the View Record eye icon next to the Risk Assessment record you want to open. For example, "Risk Assessment for Acme Corporation". The Risk Assessment Details page opens.
Editing the Risk Assessment
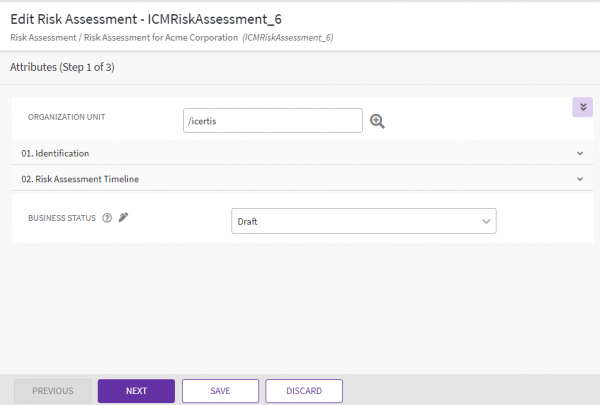
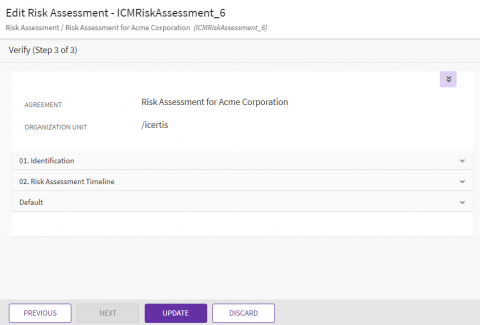
1. Click "Edit" on the Risk Assessment Details page. The Edit Risk Assessment page opens.
3. Verify the details and click "Update". The risk assessment is updated and remains in "Draft" state.
Canceling the Risk Assessment
1.Click "Cancel" on the Risk Assessment Details page.
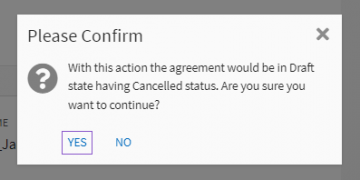
The confirmation window opens.
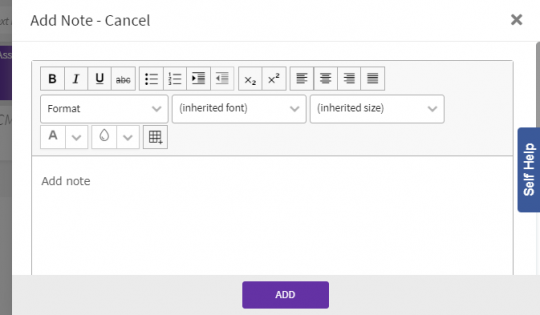
2. Click "Yes". The "Add Note" drawer opens.
3. Add note text and select the "Reason Code".
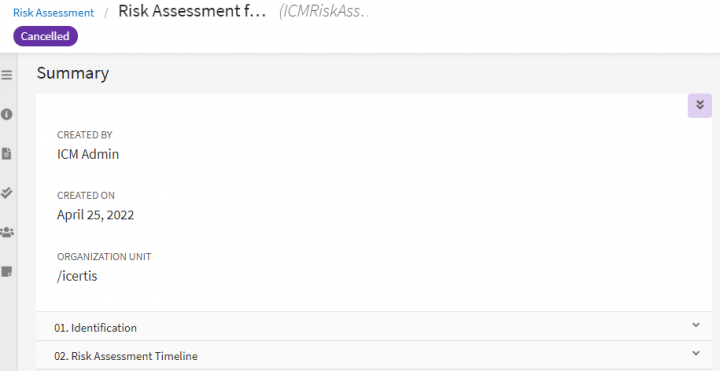
4. Click "Add". The Risk Assessment status changes to "Cancelled".
Deleting the Risk Assessment
1. Click "Delete" on the Risk Assessment Details page.
3. Click "Add". The risk assessment will be deleted and risk assessment index page opens.
Submitting the Risk Assessment
Click "Submit" on the Risk Assessment Details page.
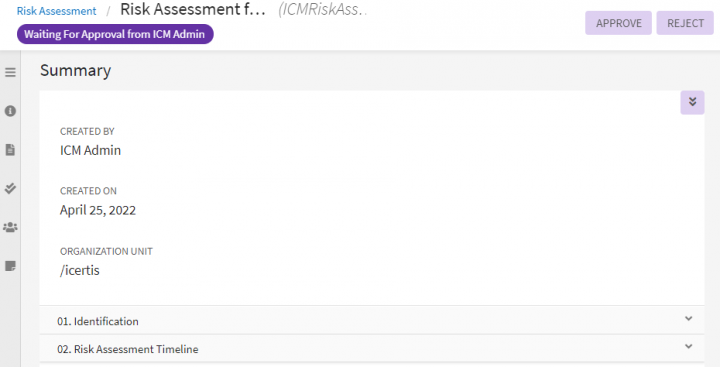
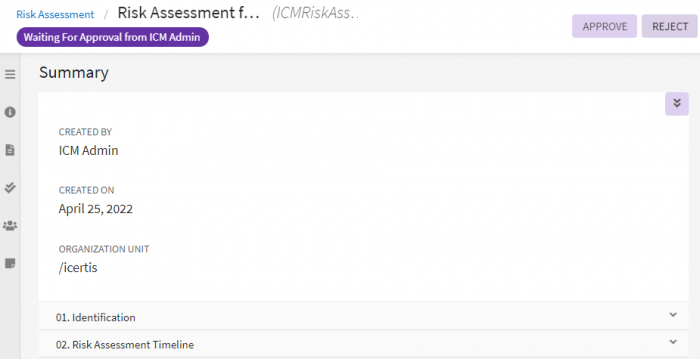
Approvers can Approve or Reject the Risk Assessment from the risk assessment Details page.
Rejecting the risk assessment
To reject:
1. Click "Reject".
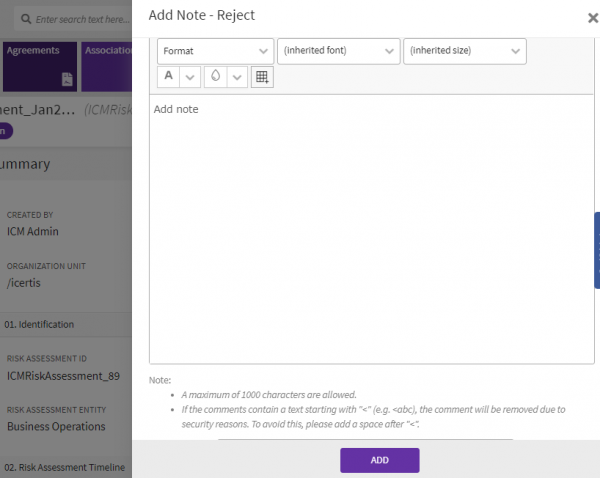
2. Add note text and select the Reason Code.
3. Click "Add". The Risk Assessment is rejected and goes back to "Draft" state.
Approving the risk assessment
To approve:
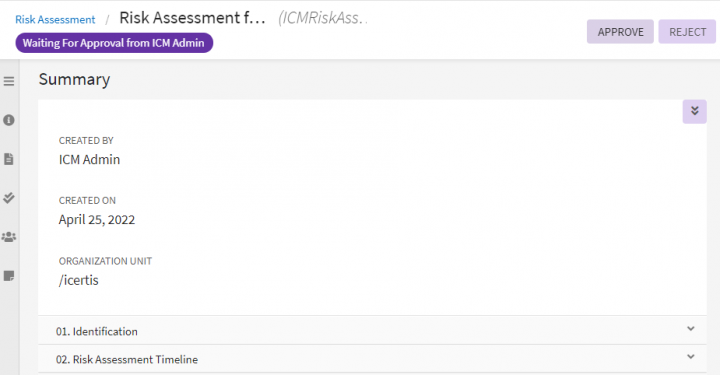
1. Click "Approve". The "Add Note" window opens.
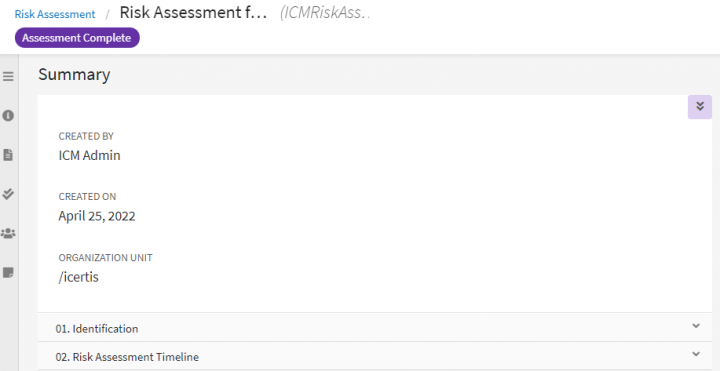
If there are no Approvers added to the Risk Assessment Team, the record will be approved directly and move to the "Assessment Complete" state.
Auditing Risk Assessment
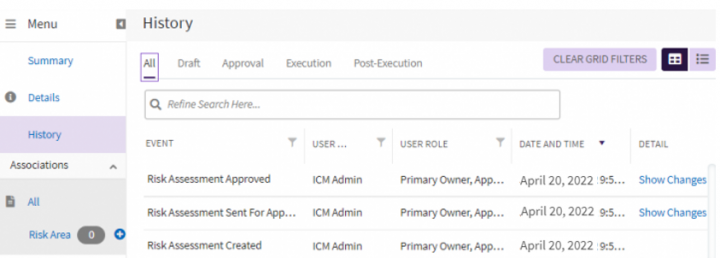
Changes made to the Risk Assessment record during various ICI risk management workflows are captured and can be viewed under "History" tab. For example, changes in "Risk Assessment for Acme Corporation throughout its lifecycle are captured.
Click "Show Changes" to view the details of the particular event of the risk assessment instance.
Working with Risk Area
Managing Risk Area includes:
- Ensuring the validity of the identified risk area
- Devising strategies to mitigate risks
- Tracking the performance until risks are completely mitigated
The risk area can be generated automatically by seeded rules based on the risk assessment responses. Users can also add the risk area manually to the risk assessment.
Creating Risk Area automatically using rules
The ICI Risk Management application provides set of rules to generate Risk Areas automatically based on the responses gathered from the risk assessment. Refer the "ICI Risk Management Configuration Guide" for details on rules used in the ICI Risk Management application.
The workflow for generating risk areas automatically includes process as follows:
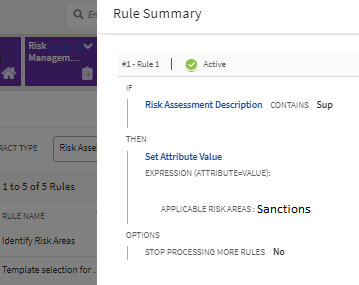
1. A recommended rule "Identify Risk Areas" can be configured by the app implementation team on the event "Risk Assessment Created" to identify applicable risk areas, based on the specific attribute values from the Risk Assessment record.
For the attribute "Risk Assessment Description", if the response is "Sup" (representing supplier), then the Applicable Risk Area is identified and set as "Sanctions".
Creating Risk Area manually
To create a risk area for risk assessment:
1. Click "Risk Management" > "Risk Assessments" from the "Home" page. The search results page with all risk assessment records opens.
2. Click the View Record icon next to the Risk Assessment for which you want to create Risk Area. The Risk Assessment Details page opens.
3. Click Create Association action icon (plus sign) next to Risk Area under the Associations. The "Create Association" for Risk Area page opens.
The "Create Association Risk Area" page has these sections:
- Reference Risk Assessment
- Risk Area Details
- Inherent Risk Rating
- Risk Remediation Plan
- Residual Risk Rating
4. Select or enter the details in the attributes in all the sections. The attributes can be mandatory, lookup type, cascading, conditional, multi-select and so on.
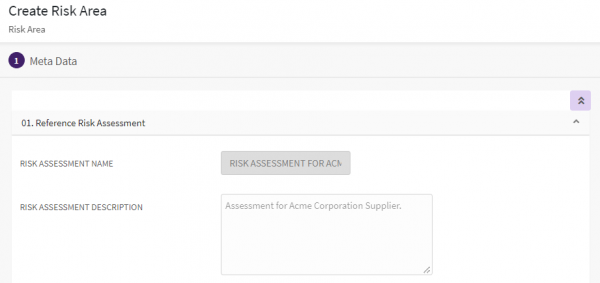
Reference Risk Assessment
This section contains the attributes:
- Risk Assessment Name: This field is populated automatically based on the information entered when creating the risk assessment.
- Risk Assessment Description: This field is populated automatically based on the information entered when creating the risk assessment.
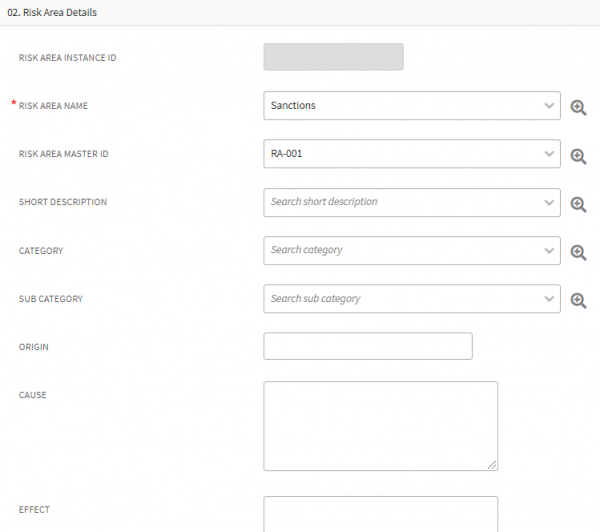
Risk Area Details
This section contains the attributes:
- Risk Area Instance ID: This is generated automatically after the risk area is created.
- Risk Area Name: Select the risk area name from the dropdown list. This populates the information for the following attributes from the masterdata.
- Risk Area Master ID
- Short Description
- Category
- Sub Category
- "Risk Area Owner"
- Origin: Enter the description that contains information about the probable source of risk area.
- Effect: Enter the description about the probable effects of the risks foreseen based on the risk assessment created.
- Additional Risk Area Owners: If risk area owner is not available in master, then user can add additional risk area owners.
Risk Area owners are Subject Matter Experts who can look into risk area end to end for validity of risk, planning risk remediation, monitoring the progress and performance of risk remediation actions
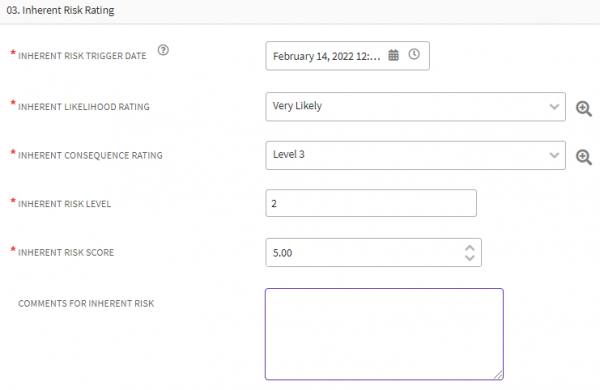
Inherent Risk Rating
Inherent risk rating is the risk rating applicable to the risk when it was determined for the first time.
This section contains the attributes:
- Inherent Risk Trigger Date: The date and time on which the inherent risk record is created.
- Inherent Likelihood Rating: The probability of occurrence of risk.
- Inherent Consequence Rating: The impact or consequence of risk occurrence.
- Inherent Risk Level:Qualitative scoring based on likelihood of risk occurrence and consequence if risk occurred.
- Inherent Risk score:Quantitative scoring based on likelihood of risk occurrence and consequence if risk occurred.
- Comments: This includes any additional information that you might want to provide regarding the risk assessment created.
Risk Remediation Plan
This section includes the informaton related to the remediation strategies and actions that can be taken to mitigate the risk areas.
This section contains the attributes:
- Remediation Action: Enter the remediation action that is planned to be taken to minimize the probable risks.
- Control Effectiveness: Select the level from the dropdown list that defines the level of effectiveness of measures that will be applied to minimize the risks.
- Remediation Action Details: Enter the remediation action details that describe the remediation actions that will be taken to minimize the risk.
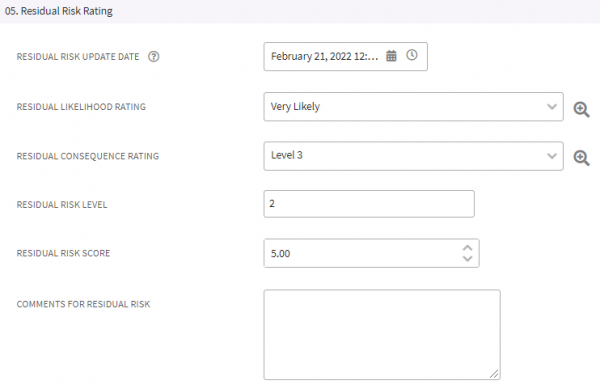
Residual Risk Rating
This section includes the information related to the residual risk left after the remediation actions are taken.
This section contains the attributes:
- Residual Risk Update Date: The date on which the residual risk record is updated.
- Residual Likelihood Rating: This indicates the likelihood of occurrence of the remaining risk.
- Residual Consequence Rating: This indicates impact of occurrence of the remaining risks happening after the mitigations actions are implemented.
- Residual Risk Level: Qualitative scoring based on likelihood and consequence if residual risk occurred.
- Residual Risk Score: Quantitative scoring based on likelihood and consequence if residual risk occurred.
- Comments for Residual Risk: This includes any additional information that you might want to provide regarding the risk area.
5. Click "Create". The Risk Area is created in Assessment state.
Searching Risk Area records
Risk Area records can be searched from:
- Advanced Search page
- Global Search
To search risk area from Advanced Search page:
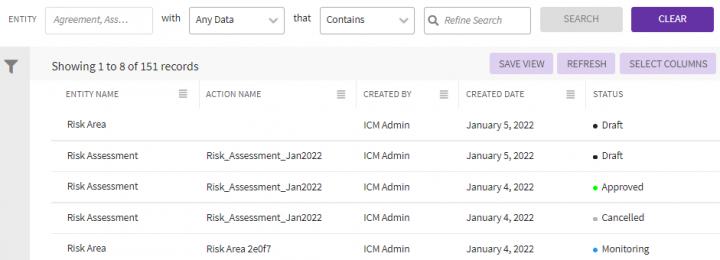
1. Click the "Advanced" link on the header toolbar. The "Advanced Search" page opens.
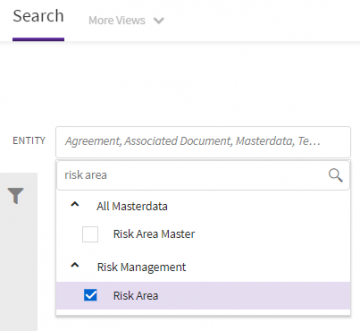
2. Select "Risk Area" in the "Entity" dropdown field.
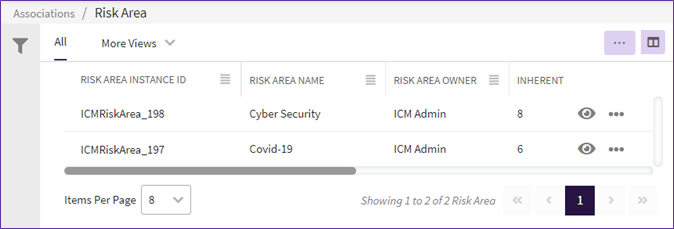
3. Click the search icon. All available Risk Area records are displayed.
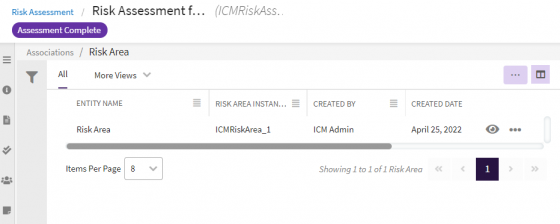
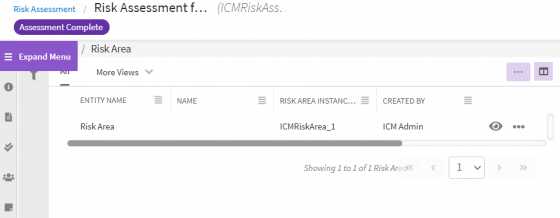
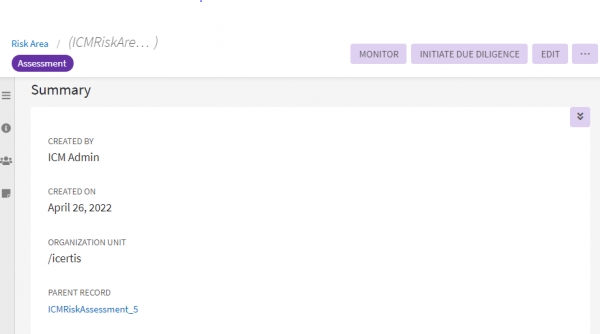
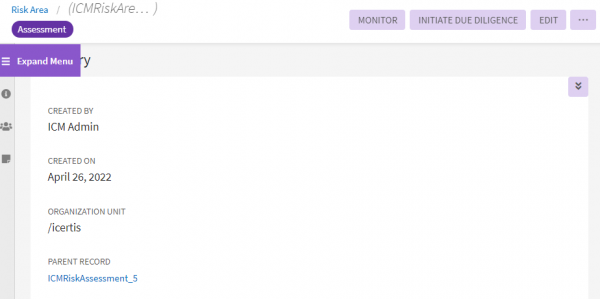
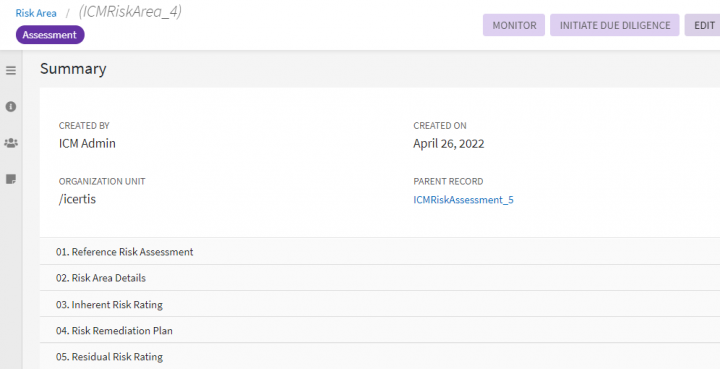
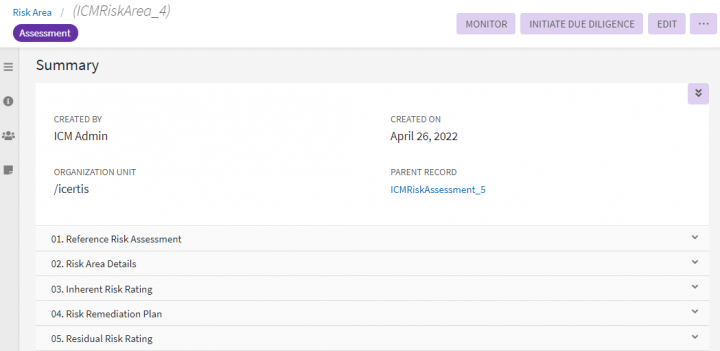
The left navigation pane can be expanded or collapsed, as needed. The collapsed view gives a wider view of the Risk Area Details page.
Risk Area using Global Search
To search risk area using Global Search:
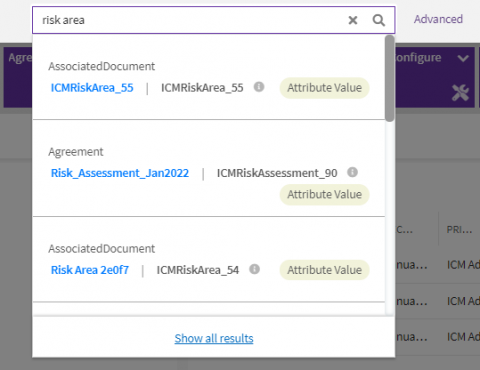
Enter the relevant search criteria in the Enter search here…search bar on the ICI UI. For example, "Risk Area". All available Risk Area records are displayed in a dropdown.
Working of existing ICI actions for Risk Area
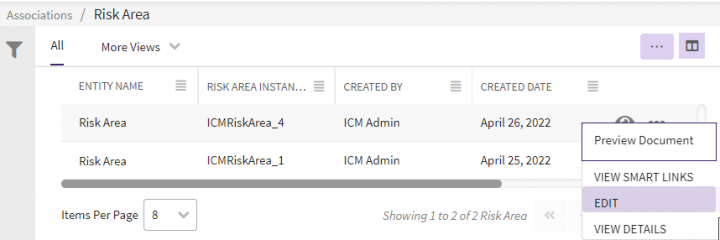
Risk area owner can take existing ICI actions for associations on risk area.
- Preview Document: Opens the preview of the risk area if available, in the Document Viewer drawer.
- View Smart Links: Opens the smart links if available, in a Smart Links window.
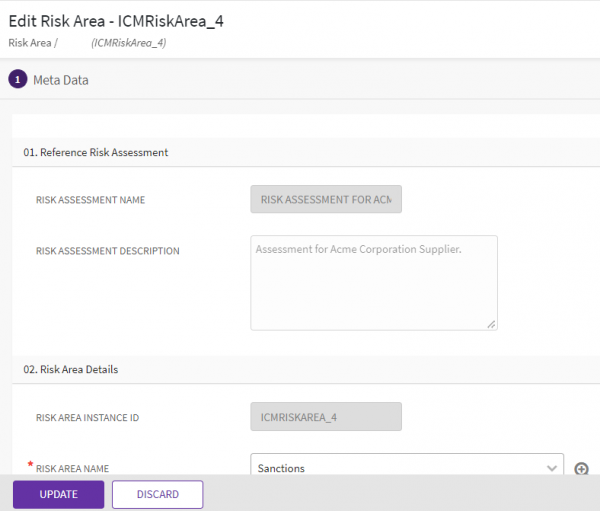
- Edit: Opens the Edit Associated Document - Risk Area page to modify the details of the risk area instance.
- View Details: Opens the Risk Area Details page.
Taking actions on the Risk Area
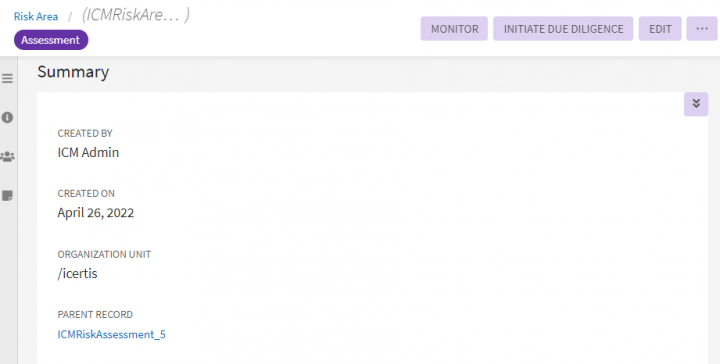
The Risk owner can be added to the risk area through configured rules. Risk owner can then take certain actions from the risk area Details page.
The actions can be:
- Initiate Due Diligence - action taken to capture more information related to the risk and validate the identified risk area.
- Remediate - action taken to mitigate the valid risk area.
- Deactivate - action taken for risk area identified as invalid. Users cannot take further actions once the risk area is deactivated.
- Monitor - action taken to track the performance based on remediation actions until risks are completely mitigated
Users can repeat the workflow Due Diligence – Remediate – Monitor until the risk is completely mitigated.
Users can also automate the workflows to initiate due diligence, remediate and monitor risk areas by configuring rules.
Editing Risk Area from Three Dots Menu
1. Click "Risk Management" > "Risk Assessments" from the Home page. The list of all available risk assessments opens.
2. Click View Record icon next to the Risk Assessment you want to opens. The Risk Assessment Details page opens.
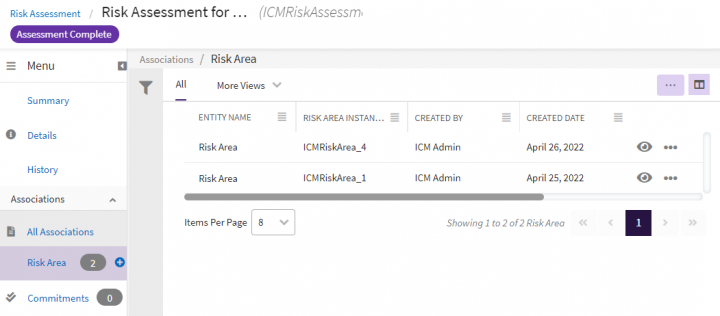
3. Click "Risk Area" tab in the left navigation. The risk area grid opens.
4. Click the three dots menu of a Risk Area record.
Editing Risk Area from Risk Area Details page
1. Click View Record icon next to the risk area you want to open. The risk area Details page opens.
2. Click "Edit". The "Edit Associated Document" for Risk Area page opens. Then, follow the aforementioned step # 6 under "Editing Risk Area from Three Dots Menu" to edit and save the editing.
Initiating Due Diligence
Click "Initiate Due Diligence". The Risk Area Details page opens again.
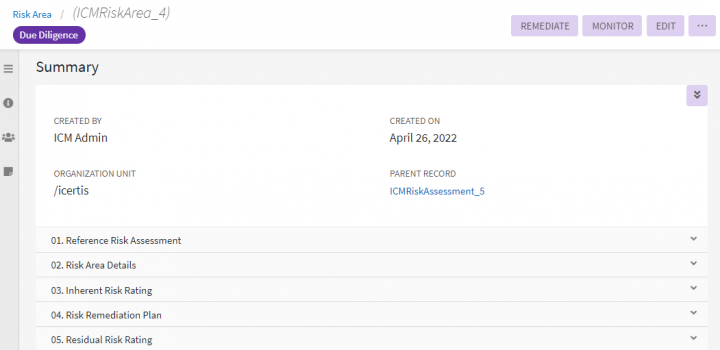
The status of the risk area changes to "Due Diligence".
Remediating the risk area
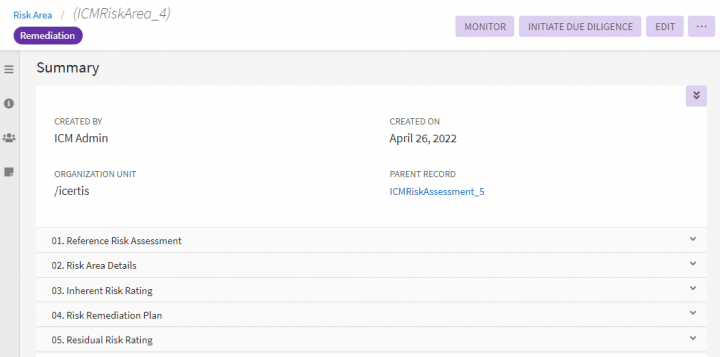
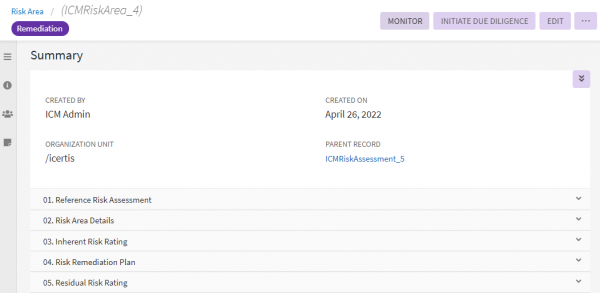
With the status of the risk area in "Due Diligence", click "Remediate" on the risk area Details page.
The Risk Area Details page opens again and the status of the risk area changes to "Remediation".
Monitoring the risk area
Users can monitor the risk areas based on the remediation actions taken to check whether the risks are reduced.
To monitor a risk area:
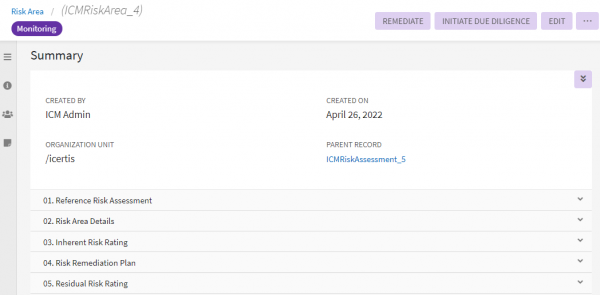
Click "Monitor" on the risk area Details page. The risk area Details page opens again and the status of the risk area changes to "Monitoring".
The status of the risk area changes to "Monitoring".
Iterating workflow for risk area
Users can repeat the actions taken on the risk areas until the risks are completely mitigated.
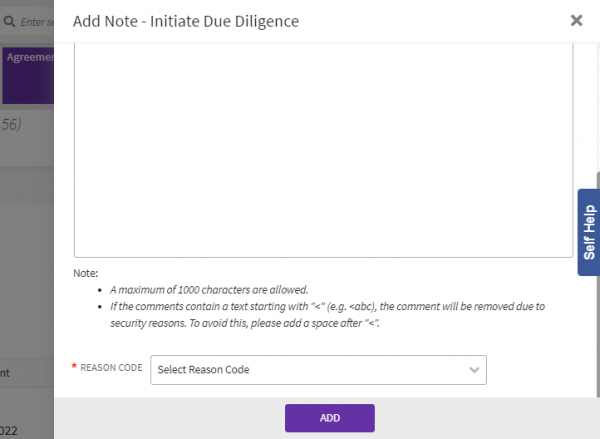
1. Click "Initiate Due Diligence" or "Remediate" on the risk area Details page for the risk area in the Monitoring state. For example, select Initiate Due Diligence. The Association "Initiate Due Diligence" note window opens to add a note.
2. Add a note text and select a Reason code.
3. Click "Add". The status of the risk area changes back to Due Diligence.
Deactivating the risk area
Risk owners can deactivate the invalid risk area. Once deactivated, no further actions are allowed on the risk area.
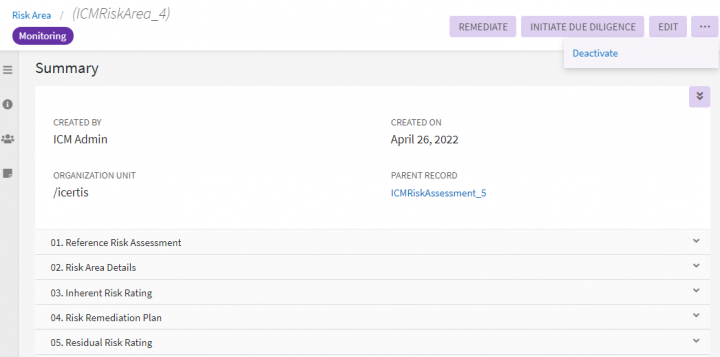
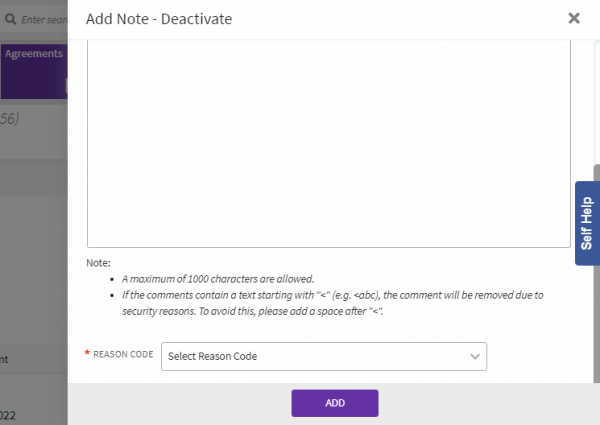
1. Click "Deactivate" on the risk area Details page. The "Add Note - Deactivate" drawer opens to add a note.
2. Add a note text and select a Reason code.
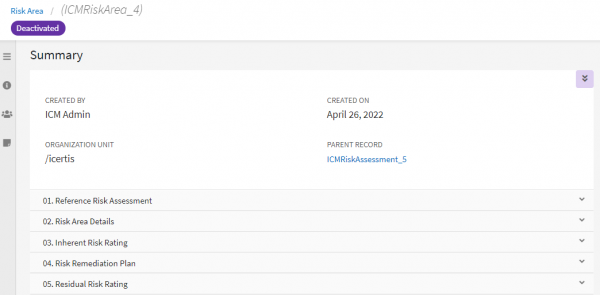
3. Click "Add". The status of the risk area changes to "Deactivated".
Auditing Risk Area
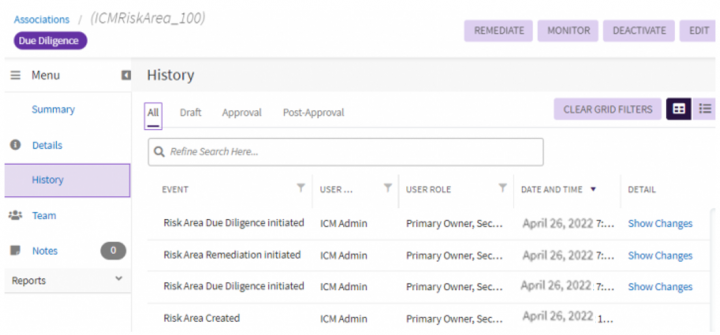
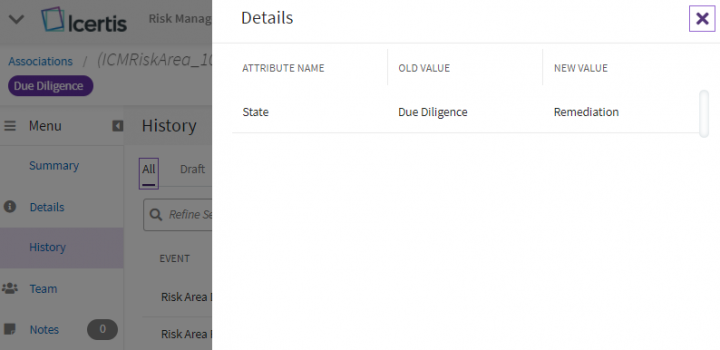
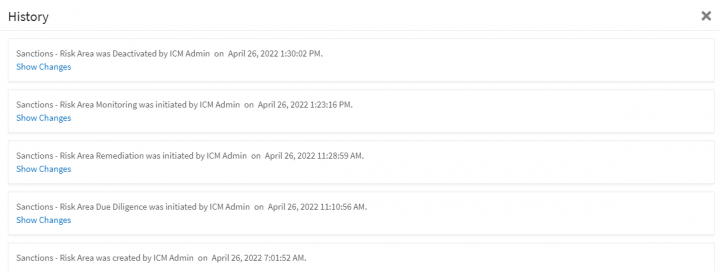
Changes made to the Risk Area record during various ICI risk management workflows are captured and can be viewed under History tab. For example, changes in "ICMRiskArea_100" throughout its lifecycle are captured.
Click "Show Changes" to view the details of the particular event of the risk area instance.
Moving Risk Area workflow automatically
Users can manage the Risk Assessment and Risk Area action workflows using the script attribute Target ICM Status. Users can set the value in Target ICM Status to specific status and move records to that particular state during the risk management workflow. For example, risk area record can be moved from the Draft state to either Due Diligence, Remediation or Monitoring state using attribute Target ICM status .
Risk assessment and risk area records can be uploaded in ICI directly in specific status by setting the state value in the Target ICM Status attribute using ICI’s Legacy Upload functionality. The business status would then be set accordingly.
For example, when users want to upload large number of historical risk assessment records using Legacy Upload, they can directly upload in the Approved state by setting it in the Target ICM Status attribute and the business state would be set as Assessment Complete.
Refer the ICI Risk Management Configuration Guide for details on Managing Risk Workflows using attribute Target ICM Status.
Creating and managing tasks for Risk workflow
Users can create remediation tasks for managing risks using commitments, obligations or any third party system. ICI Risk Management app currently supports managing Risk Assessment and Risk Area using ICI Commitment functionality.
To create a task using commitment:
1. Click "Risk Management" > "Risk Assessment" from the "Home" page. The saved search result page opens with all Risk Assessment records.
2. Click the View Record icon next to the "Risk Assessment" record you want to open. For example, "Risk_Assessment_Jan2022". The Risk Assessment Details page opens.
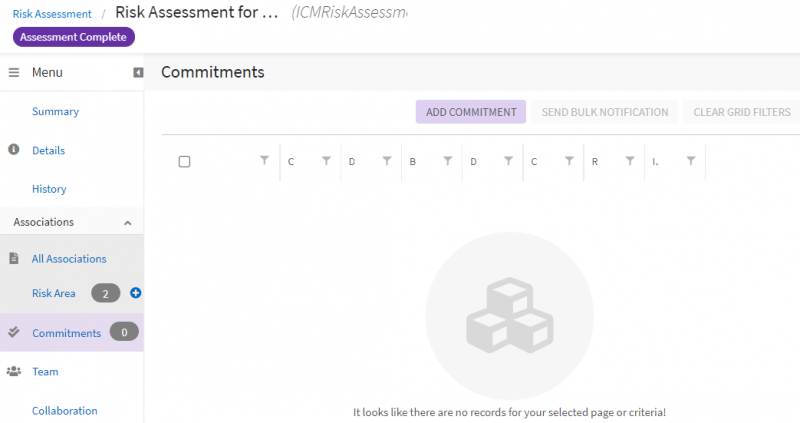
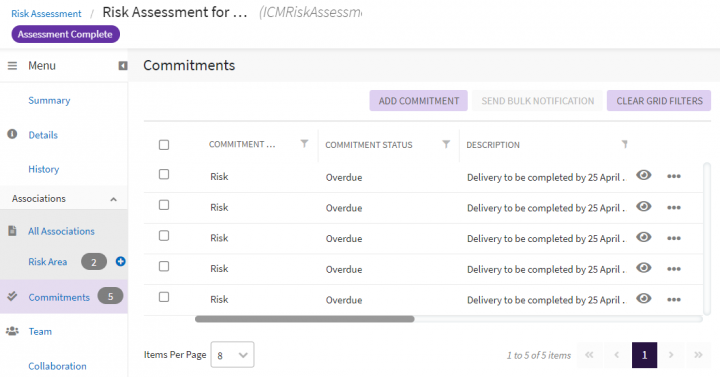
3. Click the "Commitments" tab in the left navigation. The existing commitments are displayed if any.
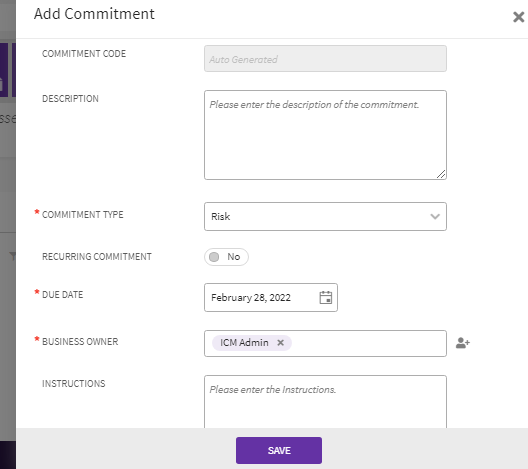
4. Click "Add Commitment" action icon. The "Add Commitment" drawer opens.
5. Enter the details for the commitment and 'c'lick "Save". The commitment is created and added to risk assessment.
To view and take action on the commitment tasks:
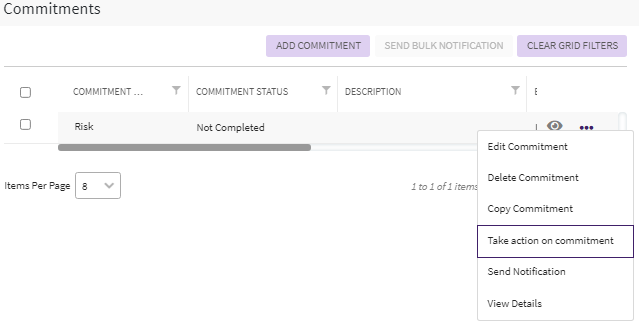
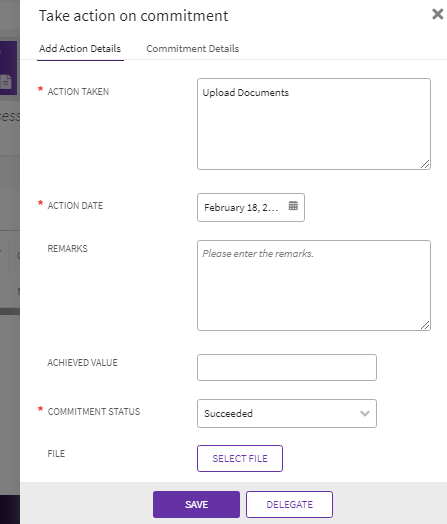
1. Click the three dots menu and click "Take action on commitment". The "Take Action on Commitment" drawer opens.
2. Add the action details.
3. Click "Save". The Commitment status is updated according to the action taken.
Refer to the "Compliance Management" page for more details on working with commitments.
Accessing the Risk Area actions Notifications
The ICI Risk Management app sends notifications when certain actions are taken on the Risk Area. These seeded notifications are sent when an events occurs:
- Risk area is created
- Risk area due diligence is initiated
- Risk area remediation is initiated
- Risk area monitoring is initiated
- Risk area is deactivated
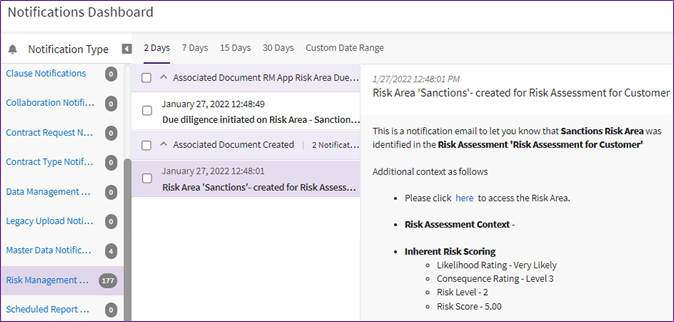
The recipients can access the notifications from "Notification Dashboard":
- Click the Notifications bell icon on the top right. The "Notifications Dashboard" opens.
- Click "Risk Management Notifications". The list of notification events opens.
- Expand the notification event. The notifications belonging to the selected event are displayed.
- Select the Notification you want to view. The selected Notification opens in the right pane.
Related Topics: Agreement Management |
