Enabling Self-Service Option
To enable the self-service option, you need to have the Admin login
1. Login as CLM Admin and navigate to Security Groups from the Admin dropdown.
2. Select and Open Default Security Group.
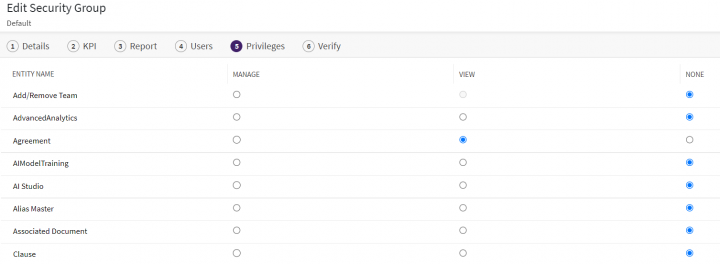
3. Edit Default Security Group.
4. Select 5 – Privileges Option.
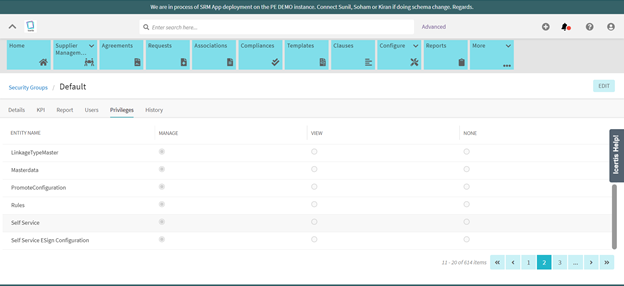
5. Provide Manage Permission to Self Service & Self Service SSO Configuration and then click Next.
6. Update the Security Group
7. Go to User Page from the Admin dropdown.
8. Select a user to whom you would like to assign Technical Role required to access the Self- Service Configuration Page. Click the eye icon to open the user page
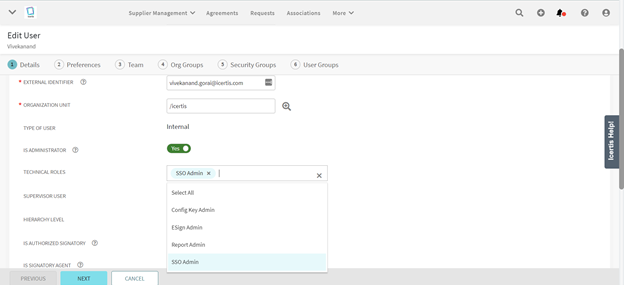
9. Edit the User details
10. Under Technical Role Select SSO Admin
11. Click 5 - Security Groups and on the same page click the Security Group button on the left, a pop-up will open then select Default Security Group and click Add button below the pop-up page
12. Click Next and then Update
13. Click the User Setting icon and then click Login as. Then select user having the Technical Role to configure the SSO and the click Add button. The system will display a popup confirming to login as a different user. Click Yes.
Note – If “Login As” option is disabled then the Named User having the Technical Role person needs to login to ICI using the named user credentials
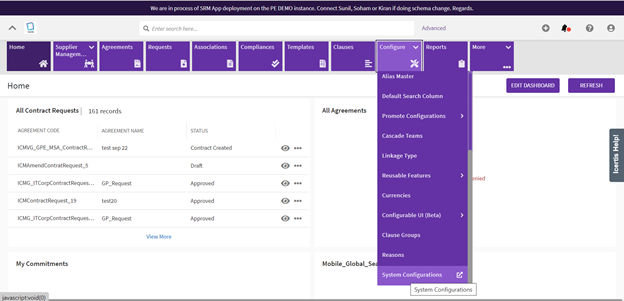
14. Using Login As an option or logging in as a named user having the technical role permission to configure navigate to System Configurations and open the System Configurations page.


